Hero image

CC's Creative Learning Shop

Average Rating3.96
(based on 28 reviews)

Teaching Art is a feast into a of colour, line, texture, space and shape. By encouraging a visual exploration in my learning I love developing a creative approach to learning in the classroom. By encouraging different techniques and an understanding of art I hope to help students appreciate visual learning more. I hope you enjoy my uploads and can use them. Please contact me if you require any further information.

159Uploads

95k+Views

30k+Downloads

Teaching Art is a feast into a of colour, line, texture, space and shape. By encouraging a visual exploration in my learning I love developing a creative approach to learning in the classroom. By encouraging different techniques and an understanding of art I hope to help students appreciate visual learning more. I hope you enjoy my uploads and can use them. Please contact me if you require any further information.
5 min scheme for Art KS3 Still-life drawing project in a variety of media
cccampcccamp

5 min scheme for Art KS3 Still-life drawing project in a variety of media

(0)
A Still-life project basic one page 5 min scheme with Dirt and Weekly plan. See the Still-life project on TES. This is an overview of acstill-life project which entails drawing in different media a still-life composition. Below are a list of all the lessons. ART THEMES before modern art. What? Modern Art? and Still-life? Composition? Rule of thirds. Organising still life. Paper prepare: Black/brown paper: newspaper/music, Draw Still-life in line. 3 Exploring pencil mark-making techniques. Pencil tonal study of geometric shapes 4 Pop Art discussions – To make a 2D coloured flat shape area of composition 5 Explore with Oil pastel: Using oil pastel detail 6 and 7 Exploring pen mark-making techniques. To draw over a Cubism Collage using a biro pen 8 Exploring Charcoal techniques Drawing on black paper using white chalk/charcoal. Research Artist study on Robert Raushenberg library 10 – Evaluation of still-life drawing project 11, 12 and 13 Mod roc Relief 14. Evaluation This powerpoint is about drawing in charcoal and white chalk on black paper. Students collage a black piece of paper on their paper and then draw a part of their still-life using this technique. The overall Learning Objectives are: To develop my understanding of Art and pre-modern art and the meaning of a Still-life drawing. To develop my observational drawing skills. To create a Still-life drawing learning to draw carefully from observation with a viewfinder To learn how to compose a composition using the rule of thirds and developing an understanding of the Golden Mean AND COMPOSITION PRINCIPLES To develop a further understanding of Pop Art and do a flat colour paper shape detail in your drawing. To develop my knowledge of the elements of art: lines, shape and form To develop techniques in different media in my drawing and to explore markmaking of pen, pencil, oil pastel and charcoal. To practise my observational drawing skills in the following techniques: oil pastel, drawing with a bro pen, using chalk and charcoal To develop my knowledge of Robert Raushenberg (Pop Art) and practise drawing over a light printed surface with pencil. To explore developing a relief surface of an area of my still -life drawing and develop this in mod roc technique
Art History: Post-impressionist artists, Van Gogh, Guaguin, Cezanne and Fauvism
cccampcccamp

Art History: Post-impressionist artists, Van Gogh, Guaguin, Cezanne and Fauvism

(0)
This gives a brief outline of what is Post-impressionism and a detailed description of each of the artists, Van Gogh, Cezanne and Guaguin and how they changed the way we look at the world. Each of these artists were key influencers for the 20th Century art movements - Expressionism, Cubism and Fauvism. The slides explain how each artist interpreted their subject. It has a good set of examples of each art movement and gives a description on how the art movement came about and what its characteristics are. It also highlights the work of the Fauvist artists and explains what this movement was about.
Geometric abstraction and White- ART A-level project showing analysis, exploration and outcome.
cccampcccamp

Geometric abstraction and White- ART A-level project showing analysis, exploration and outcome.

(0)
This is a project for A-level students starting with looking at Geometric Abstraction and the use of the colour ‘White’ in the work of modern abstract artists. This will help students to develop their own personal theme. This is a good starting theme for A-level students or IB students and gives them a process or idea to start with in order to develop their own personal outcome. It gives some examples to prompt the students to start thinking of: What is Abstraction, Conceptual Art, Cubism Abstraction and Geometric Art? Students are asked to research various artists who show Geometric abstraction and ‘white’ from the Islamic artists to Kasimer Malevich (Suprematism), Wassily Kandinsky and Piet Mondrian. The project continues giving the A-level students some practical tasks to develop the idea of how to paint a ‘white’ object. There are also examples of some contemporary artists who use geometric abstract shapes and abstraction in nature. Students should be asked to find their own artists they like who use Geometric abstraction and white. Students then explore artists who have used white and look at how they use white in a textural way. Students can look at Robert Rauschenberg. Ben Nicholson and Barbara Hepworth. Students choose one artist and make a booklet exploring their analysis of the artists and the way they use white, but also an experimental booklet showing how to show ‘white’ textual surfaces. Students also take photographs of objects which are ‘white’ to develop further using different media and then subsequently to develop their own final piece based on their own personal research into the subject ’ white’ and ‘geometric abstraction’. Examples of student’s work is given to help students explore various media to develop their own personal ‘white’ outcome. There are also examples of final pieces of A-level students who tried to paint something white showing how they used pastel colours in their finals to develop their outcomes.
Art materials to use at home- recycled materials and examples of different techniques
cccampcccamp

Art materials to use at home- recycled materials and examples of different techniques

(0)
Making something out of the resources you have at home. This gives a visual list of resources you can use at home to draw with, paint with and make 3D forms with. Good for GCSE students and above for they need to explore a number of techniques for assessment objective. There are videos to motivate and to demonstrte and there are examples of different types of art you can do. Think of some ideas for making art out of cardboard, recycled containers, toilet rolls, toilet paper, old books, magazines, old clothes, wool, ear buds, toothpicks, straws, stones/plants. It also suggests you could also on your phone make a piece of artwork using a photo and an app or draw on your phone. This is to inspire and students to decide what you are going to make…….
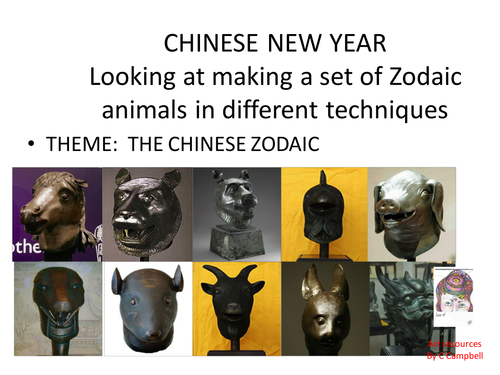
Art techniques to make set of Chinese Zodiac animals, technique: paper art, plastic art, painting...
cccampcccamp

Art techniques to make set of Chinese Zodiac animals, technique: paper art, plastic art, painting...

(0)
Used in a house competition where each House makes a different set of animals for Chinese New year in a different technique. Animals in paper art, photoghrapy manipulation of animals, Painting animals, Plastic animals and paper mache artists. Students work in groups and each group makes a different way of making a set of animals. This is a fun activity for KS 3 Art project or an after school club.
Cubism ART No4: Painting skills - using a card to create effects
cccampcccamp

Cubism ART No4: Painting skills - using a card to create effects

(0)
Examples of Cubism showing the close up detail of markmaking and analysis in the works of the Cubists. By developing their painting into textural surfaces with sharp lines to mimic the Cubist analytical works. There are examples of Cubist works with reference to mark-making in the cubist shapes and using tones. Adding scraping paint with combs, and making paint textural marks to create a variety of mark-making effects. This powerpoint links with Cubism No.1 Cubism No 2. and Cubism No 3 and No 5.
Cubism Art No.3 Painting skills, mixing colours and an understanding of complementary colours
cccampcccamp

Cubism Art No.3 Painting skills, mixing colours and an understanding of complementary colours

(0)
Students in Cubism No. 2 have made a collage of a celebrity and in this powerpoint students begin to paint this in the style of the analytical cubist artists. Students use a limited colour scheme like the Cubists and choose two complementary colours. Students are shown how these colours cancel each other and how to create interesting colours through mixing thse colours and adding white and black. There are examples of various complementary outcomes and students are given key terms to use in relation to colour. Degraded colours, tint, shade,…
Art of Aminah Robinson -analyse artist to make fabric collage, linked to bundle/stitching Xmas song
cccampcccamp

Art of Aminah Robinson -analyse artist to make fabric collage, linked to bundle/stitching Xmas song

(0)
This is a powerpoint on Aminah gives a worksheet to analyse this fabric artist. This powerpoint links to two other powerpoints where students make a Xmas collage. Aminah used her artwork to celebrate and memorialize the neighborhood of her childhood – Poindexter Village in Columbus and her journeys to and from her home. In drawings, paintings, sculpture, puppetry and music boxes, she reflected on themes of family and ancestry, and on the grandeur of simple objects and everyday tasks. There are questions on this artist and students make their own Xmas collage linked to a song. (see bundle)
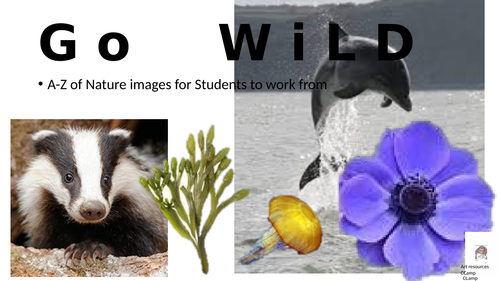
A-Z of pictures of nature/sea-life to use for Art Polyprint project KS3 Nature project
cccampcccamp

A-Z of pictures of nature/sea-life to use for Art Polyprint project KS3 Nature project

(0)
Pictures W Wading birds, Water boatmen B Bladderwrack seaweed, Basking shark, barnacles, badger A Anenomes (beadlet) abalones F Foxgloves, fox L Limpets Z Zooplankton N Nettles J Jellyfish H Herring gull S Sparrows, Sparrow Hawk, Starlings, Short-eared Owl I Iris Y Yellow wagtail, yellow horned poppy D Dolphins X oXe eye daisy M Mussels, Marram grass K Kite (black) C Cockles, Carrion crow, Chaffinch, common Newt, Common Starfish, Common Blenny, Common Shore Crab O Oystercatchers W Walney Geranium flower or similar TheIslandIsland shape filled with different wildlife T Toads (natterjack) V Viper’s bugloss Q Quercus (oak) R Razor shells, Redshank, Rays, Red Admiral butterflies, Rock Goby Robin U Umbellifer (Cow parsley) G Grey seal P Pipe Fish, Pelican’s foot shells, Peregrine Falcons, Painted Lady Butterflies.
Art exam short evaluation drawing:Yr 7 rope, Yr 8 fabric pattern/peg/brush and Yr 9 portrait drawing
cccampcccamp

Art exam short evaluation drawing:Yr 7 rope, Yr 8 fabric pattern/peg/brush and Yr 9 portrait drawing

(1)
This is a standardisation test for KS 3 testing drawing skills. You will need to as a teacher to resource the following for students: Year 7 Thick rope tied up, Year 8 Piece of fabric square with a peg or/and ribbon or a paintbrush to replace peg, Year 9 Xmas baubels or large spoons that have a reflection. This did not cost too much to put together for a yearly assessment. Year 7: Rope drawing - looking at the ability to create volume with tone and then to add in the pattern lines of the rope texture with the volume effect. Some students are able to capture good line patterns showing good design skills and line qualities. More able students are able to capture the volume. Year 8: Peg/large paintbrush and Fabric drawing - This is an exercise in capturing the volume, pattern and shading and accurate perspective drawing of the peg. Some students are able to show this more accurately and can show good tonal variations and the illusion of the 3D form in the peg and the brush. The lovely use of colour in the fabric supports students with strong design skills and pattern Year 9: Self identity drawing a portrait in a spoon or a bauble supports a theme on Self identity in year 9 and students can re-fine their skills in drawing themselves carefully in a bauble. Looking at volume and accurate tonal shading to draw a sphere with the distorted self portrait. Students enjoy capturing themselves having learnt about portrait drawing they can begin to excel in trying to create an illusion of themselves.
GCSE Art course summary sheet: CRIB sheet 3 pages : Objectives/Writing frames/Evaluation/Composition
cccampcccamp

GCSE Art course summary sheet: CRIB sheet 3 pages : Objectives/Writing frames/Evaluation/Composition

(0)
This is for your Year 10 GCSE group and gives a summary of the GCSE course in two sheets. It is a very helpful sheet summarising each objective and the requirements and the amount of pages that are needed in your sketchbook. There is also the writing framework required for artist analysis - objective one. There is also a brief outline of the principles of design and what students need to look for. Also there are helpful questions to help students evaluate their outcomes. A must for GCSE Art and Design!!
GCSE critical analysis and response Victoria Crowe use of gold leaf theme on 'layers' with acrylics
cccampcccamp

GCSE critical analysis and response Victoria Crowe use of gold leaf theme on 'layers' with acrylics

(0)
This is a resource on examples of Victoria Crowe’s work and this has been used with year 11 to get them to experiment with acrylic paint and gold leaf Students ts find out about Scottish painter and write up a paragraph on her work. Questions included for Critical analysis Artist study for GCSE and A-level - interpreting artist. Learning a new technique and painting with gold. Also a link to a video on using gold leaf to help with artist interpretation. STUDENTS TO SELECT ONE OF HER WORKS FROM SLIDES PRACTISE HER TECHNIQUES EXPLORING PAINT AND GOLD LEAF EXPERIMENTS MAKE A PAGE In sketchbook FOR AN ARTIST STUDY ON HER WORK
Art history: A short presentation, key points on Pop Art, with Pop artists and Super-Realist Art.
cccampcccamp

Art history: A short presentation, key points on Pop Art, with Pop artists and Super-Realist Art.

(0)
A presentation explaining briefly what is Pop Art with lots of examples of different artists, especially the American Pop Artists. Rauschenberg, Claes Oldenberg, There is one slide on Super-Realism and the work of Chuck Close and the sculptor Duane Hanson. A short detailed outline of Pop Art and Superrealism. There are key examples of artist’s works and characteristics of the art movement.
Making Miro Art: KS3 fantasy creatures: coffee blob into a design, making a fantasy abstraction
cccampcccamp

Making Miro Art: KS3 fantasy creatures: coffee blob into a design, making a fantasy abstraction

(0)
Learning Objective Create a drawing using the coffee splash Ability to find a pattern or picture in an abstraction Ability to extend this into a magical creature! Presentation and explanation of piece- Giving this a title Understanding of Miro’s art and technique Understanding of Modern or contemporary art from the 1940’s STARTER ACTIVITY Look carefully at the colour photocopy on your table. Describe the shapes that you see in the picture How would you describe the mood of the picture? Why? What title would you give this picture? DO THE WORD SEARCH Main Activity TEACHER DEMONSTRATE THE PROCESS- Hand out activity sheet. Newspaper Cartridge paper A4 2B lead Pencils, Paper Cups 8 cups Cold strong coffee liquid in flask Spoons 8 spoons Students begin task: Students work on the Creative Practical Task independently. Independent assistance ensuring and supporting students to achieve the following tasks: Place some newspaper beneath your paper.   Carefully but deliberately spill some ink thinned with water, or some coffee, tea or cola(preferably diet cola as it does not contain sugar to make your drawing sticky).   Allow the liquid to run where it will, and then let it dry by dabbing this with paper-towel   Study the stains on the paper, trying to see images triggered in your mind by the stains.   Using a writing pen/pencil, begin to reinforce the envisioned images with line, perhaps adding cross-hatching to create tone or add some more shapes to create a more recognizable subject. Continue to re-inforce images until you are satisfied that the drawing is finished. Title your drawing – this is important and should be given some thought. MAKING MIRO Collage Trace your imaginery shapes and colour these in. Do a background wash and layer these magical shapes on your background. PLENARY Assessment of Competencies/Success Critieria to take place in Plenary Students swap seats and mark a partner’s work EBI or WWW on the work on their paper WASH HAND AND PACKING EQUIPMENT AWAY Students to wash hands and take responsibility for room and equipment and their own work. SHOW AND DISPLAY Students leave their magical creature work on a table. Students when leaving stand around the table and asked to describe one positive comment on the work on display What is creative about the work on Show? How can we improve any of the work on Show? Who has excelled in their work today? And Why? If we had to evaluate the outcome – what work shows creativity, imagination and, an attempt to truly achieve success in outcome today?. Dismiss class
Cubism Art No2., Understanding terms in Cubism, analyse and simplify using a celebrity picture.
cccampcccamp

Cubism Art No2., Understanding terms in Cubism, analyse and simplify using a celebrity picture.

(0)
This powerpoint focuses on further gaining an understanding of Cubism and its use of multiple viewpoints. Students analyse Analytical examples of Cubism and write this in their book and refer to different key terms to use in Cubism like, multi-faceted, layering, multi-viewpoints, fragmented, geometric shapes. Terms are given ready to print and examples of analytical works ready to print. Students are also shown how Picasso simplifies and stylises his subjects. There are examples of some celebrity pictures where students need to break this up into geometric shapes and re-collage the shapes on an A4 paper. This is a c omposition to trace and where students will need to paint in a further lesson, compose an outcome to paint and analyse into a cubist analytical painting. Students to gain an understanding of Analytical Cubism and how to fragment a picture into geometric shapes To make a collage of a famous celebrity artist and to complete presentation on Cubism in books. After this task students simplify this collage into a tracing of collage getting ready to paint this into simplified shapes. See Cubist No.3. SUMMARY OF THE FULL PROJECT BELOW This is a series of powerpoints 5 lessons for students to learn to paint a Cubist painting using a celebrity picture and complementary colours. Students to gain an understanding of Analytical Cubism and how to fragment a picture into geometric shapes and then learn to paint it in complementary colours. Students then further develop this into a 3D sculpture and make a construction mobile cutting a copy of the painting into shapes.
Cubism Art, No 5:making a 3D construction sculpture  of analytical Cubism style.
cccampcccamp

Cubism Art, No 5:making a 3D construction sculpture of analytical Cubism style.

(0)
This is part of a set 5 powerpoints on Cubism, painting skills and colour mixing and constructing a 3D sculpture. This attached Powerpoint deals with the development of the 3D sculpture Powerpoint 1 Using a drawing of face break this up into geometric shapes and compose an outcome to paint and analyse a cubist analytical painting and develop and understanding of Cubism Powerpoint 2 Explore a mixing of colours, especially complementary colours and develop an understanding of contrasting colours Powerpoint 3 Practice painting skills and applying paint smoothly Powerpoint 4. Painting skills using a card Poweerpoint 5. Simplify and construct a 3D analytical sculpture from your painting and evaluate your putcome. The powerpoint gives instructions and examples to show how to cut and join this. Firstly pasting on cardboard a copy of the painting and then cutting this up in shapes and building a construction of form as a 3D sculpture This then becomes a construction of a 3D sculpture using cardboard to make a mobile or standing sculpture based on Cubism. To paste painting onto Cardboard Ceareal box and to paint the back of the box To finally construct with glue gun to form a hanging mobile. Evaluation of project This is a series of 5 powerpoints where students to learn to paint a Cubist painting using a celebrity picture and complementary colours. Students to gain an understanding of Analytical Cubism and how to fragment a picture into geometric shapes and then learn to paint it in complementary colours. Develop this into a 3D sculpture and make a construction mobile cutting a copy of the painting into shapes.
KS3 Art Using Ndebele art culture design symmetry pattern to make a brooch, jewellery
cccampcccamp

KS3 Art Using Ndebele art culture design symmetry pattern to make a brooch, jewellery

(0)
This is a good exercise to teach students about symmetrical pattern design and to learn about an interesting culture in South Africa - the Ndebele. The powerpoint gives you loads of examples of their work and links to You tube clips and South African songs. Develop an understanding of the Ndebele culture through the links on the powerpoint. There are lots of examples of their work to inspire and enable students to develop their own symmetry pattern in the style of the Ndebele artists. There are questions and info sheets. Students will be able to make a symmetry pattern - a piece of jewellery as students Paint a piece of thin wood- cut into a shape. This is a good project for an ‘international project’ to develop a cultural awareness. Students design and make a symmetry pattern in the style of the Ndebele artists and then transfer this to a piece of wood shape.